First check raspi-config and rpi-update install!
Install rpi-update:
$ sudo apt-get update
$ sudo apt-get install ca-certificates
$ sudo apt-get install git-core
$ sudo wget http://goo.gl/1BOfJ -O /usr/bin/rpi-update
$ sudo chmod +x /usr/bin/rpi-update
$ sudo rpi-update
Raspberry Pi firmware updater by Hexxeh, enhanced by AndrewS
Performing self-update
Autodetecting memory split
Using ARM/GPU memory split of 192MB/64MB
We're running for the first time
Setting up firmware (this will take a few minutes)
Using SoftFP libraries
/opt/vc/sbin/vcfiled: error while loading shared libraries:libvchiq_arm.so: cannot open shared object file: No such file or directory
If no errors appeared, your firmware was successfully setup
A reboot is needed to activate the new firmware
$ sudo ldconfig
$ sudo rpi-update
Raspberry Pi firmware updater by Hexxeh, enhanced by AndrewS
Performing self-update
Autodetecting memory split
Using ARM/GPU memory split of 192MB/64MB
Updating firmware (this will take a few minutes)
Your firmware is already up to date
$ sudo reboot
Next,
1. raspi-config ----> Update
2. rpi-update
3. sudo sh -c 'cp /root/.rpi-firmware/* /boot'
sudo rm /boot/arm*_start.elf
4.sudo nano /boot/config.txt
5. In the last line write gpu_mem_512=64.
6.Ctrl+O
7.ctrl+x
8.Reboot
9.$free -m to check is 438.
10.Fast!!!!!!!!!!
Wednesday, 24 October 2012
Thursday, 18 October 2012
[surprise ]512MB Pi arrived!
In before development I used pi which the school support me. I buy my pi last month, and this Monday my friend tell me pi is update to 512mb! And my pi is arrived today! it 512MB !

Friday, 12 October 2012
[Basic]Communication software test
This is a test for my software which basic on java and android
1.Connect keyboard, mouse, monitor and network cable with Raspberry Pi.


3. Open Txterminal

4.Use the instruction ifconfig to show the Ip address in Pi.

5. Copy the address to AEP app which had install in my I9100 before.

6. Start the software in Pi which use java.

5. Send ifconfig from android app, and can see the feedback from Pi (Black ground make the word not clear, I would change next time.)

6. The result show in the Pi. Succeed!

7.Use the menu in I9100. there two LNK easy to Power off and reboot pi! And I would test the Power off in next video.

The result of power off!
Succeed!
How to using Java in Debian
Using Java in Debian
To install the default JRE (Java Runtime Environment) on your system, run:
apt-get install default-jre
To install the default JDK (Java Development Kit) on your system, run:
apt-get install default-jdk
Monday, 8 October 2012
How do I download and install 32-bit Java for Linux Platforms?
Reference:http://www.java.com/en/download/help/linux_install.xml
How do I download and install 32-bit Java for Linux Platforms?
This article applies to:
You will also need a Pentium 166MHz or faster processor with a minimum of 75MB free disk space and a minimum of 64MB of RAM.
Note: For downloading Java other flavors of Linux see Java for Ubuntu, Java for Fedora
Follow these steps to download and install 32- bit Java for Linux.
 The instructions below are for installing version Java 7 Update 7 (7u7). If you are installing another version, make sure you change the version number appropriately when you type the commands at the terminal. Example: For Java 6u35 replace 7u7 with 6u35. Note that, as in the preceding example, the version number is sometimes preceded with the letter
The instructions below are for installing version Java 7 Update 7 (7u7). If you are installing another version, make sure you change the version number appropriately when you type the commands at the terminal. Example: For Java 6u35 replace 7u7 with 6u35. Note that, as in the preceding example, the version number is sometimes preceded with the letter
Test Installation
To test that Java is installed and working properly on your computer, run this test applet.
How do I download and install 32-bit Java for Linux Platforms?
This article applies to:
- Platform(s): Red Hat Linux, SUSE Linux, Oracle Linux, Oracle Enterprise Linux, SLES
- Java version(s): 6.0, 7.0
Linux System Requirements
See supported System Configurations for information about supported platforms, operating systems, desktop managers, and browsers.You will also need a Pentium 166MHz or faster processor with a minimum of 75MB free disk space and a minimum of 64MB of RAM.
Follow these steps to download and install 32- bit Java for Linux.
Download
- Go to http://java.com and click on the Download button
- There are two types of installation packages.
- Java on Linux Platforms
This is an archive binary file that can be installed by anyone (not only the root users), in any location that you can write to. However, only the root user can install Java into the system location. - Java on RPM-based Linux Platforms
32-bit RPM-based Linux platforms, such as Red Hat and SuSE, use a RPM binary file (.rpm) in the system location. You must be root to perform this installation.
Download the package that best suits your needs. You can download the file to any of the directories on your system. - Java on Linux Platforms
- Download and check the download file size to ensure that you have downloaded the full, uncorrupted software bundle. Before you download the file, notice its byte size provided on the download page on the web site. Once the download has completed, compare that file size to the size of the downloaded file to make sure they are equal.
Install
Java for Linux Platforms
The instructions below are for installing version Java 7 Update 7 (7u7). If you are installing another version, make sure you change the version number appropriately when you type the commands at the terminal. Example: For Java 6u35 replace 7u7 with 6u35. Note that, as in the preceding example, the version number is sometimes preceded with the letter u, and sometimes it is preceded with an underbar, for example, jre1.7.0_07.- Change to the directory in which you want to install. Type:
cd<directory path name>
For example, to install the software in the /usr/java/ directory, Type:cd /usr/java/
Note about root access:To install Java in a system-wide location such as /usr/local, you must login as the root user to gain the necessary permissions. If you do not have root access, install the Java in your home directory or a subdirectory for which you have write permissions - Move the .tar.gz archive binary to the current directory.
- Unpack the tarball and install Java
tar zxvf jre-7u7-linux-i586.tar.gz
The Java files are installed in a directory calledjre1.7.0_07in the current directory.
In this example, it is installed in the/usr/java/jre1.7.0_07directory.
When the installation has completed, you will see the word Done. - Delete the .tar.gz file if you want to save disk space.
Java for RPM based Linux Platforms
The instructions below are for installing version Java 7 Update 7 (7u7). If you are installing another version, make sure you change the version number appropriately when you type the commands at the terminal. Example: For Java 6u35 replace 7u7 with 6u35. Note that, as in the preceding example, the version number is sometimes preceded with the letter u, and sometimes it is preceded with an underbar, for example, jre1.7.0_07.- Become root by running
suand entering the super-user password. - Uninstall any earlier installations of the Java packages.
rpm -e<package_name> - Change to the directory in which you want to install. Type:
cd<directory path name>
For example, to install the software in the /usr/java/ directory, Type:cd /usr/java - Install the package.
rpm -ivh jre-7u7-linux-i586.rpm
To upgrade a package,rpm -Uvh jre-7u7-linux-i586.rpm - Delete the .rpm file if you want to save disk space.
- Exit the root shell. No need to reboot.
Enable and Configure
Firefox or Mozilla
To configure the Java Plugin follow these steps:- Exit Firefox browser if it is already running.
- Uninstall any previous installations of Java Plugin.
Only one Java Plugin can be used at a time. When you want to use a different plugin, or version of a plugin, remove the symbolic links to any other versions and create a fresh symbolic link to the new one. - Create a symbolic link to the
libnpjp2.sofile in the browser plugins directory- Go to the plugins sub-directory under the Firefox installation directory
cd<Firefox installation directory>/plugins - Create the symbolic link
ln -s<Java installation directory>/lib/i386/libnpjp2.so
Note: If you are upgrading your Java version then before creating new symbolic link you should remove old symbolic link to enable latest downloaded Java.
To remove old symbolic link:
typecd<Firefox installation directory>/pluginsrm libjavaplugin_oji.so
Example- If Firefox is installed at this directory:
/usr/lib/<Firefox installation directory> - And if the Java is installed at this directory:
/usr/java/<Java installation directory> - Then type in the terminal window to go to the browser plug-in directory:
/usr/lib/<Firefox installation directory>/plugin - Enter the following command to create a symbolic link to the Java Plug-in for the Mozilla browser.
ln -s /usr/java/<Java installation directory>/lib/i386/libnpjp2.so
- Go to the plugins sub-directory under the Firefox installation directory
- Start the Firefox browser, or restart it if it is already up.
In Firefox, type about:plugins in the Location bar to confirm that the Java Plugin is loaded. You can also click the Tools menu to confirm that Java Console is there.
To test that Java is installed and working properly on your computer, run this test applet.
Tuesday, 2 October 2012
[Pi]Raspberry pi is arrived.
I had get rasperry pi from lab with other equipment. I forget power supply and wifi adopted. I would buy myself I can't wait for it. later of this week, I would upload a video about Raspberry pi.

Monday, 1 October 2012
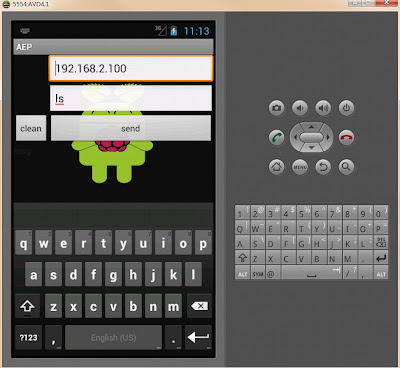
[Basic Application] AEP in Android
This only application which I not test in Raspberry Pi,because this My Pi not arrived now.
This application only can sent instruction to Wi-Fi computer!
There some Figure in application!
This application only can sent instruction to Wi-Fi computer!
There some Figure in application!

[Logo]Android Eat Raspberry Pi Logo
I design this logo by myself!
I want my Galaxy II(I9100) which phone use Android to eat my Raspberry Pi!
It would be Surprise!

I want my Galaxy II(I9100) which phone use Android to eat my Raspberry Pi!
It would be Surprise!
Subscribe to:
Posts (Atom)